This cheese muffin recipe is my way of turning a jumble of leftover cheeses into something warm and comforting. After a busy market day, I often find myself with odds and ends—crumbly feta, sharp cheddar bits, a stray blue cheese—that I don’t want to waste.
Baking these muffins feels like a small victory, a way to transform imperfect cheese into a satisfying snack or breakfast. It’s honest, no-fuss, and perfect for those moments when you want something cheesy but don’t want to fuss over complicated recipes.
There’s something about the aroma—melty cheese and toasted batter—that makes the kitchen feel a little more like home. These muffins are a reminder that even leftover bits can come together into something warm, tasty, and worth sharing.
Focusing on how this cheese muffin recipe is my go-to for using up leftover cheese crates from local markets, turning odds and ends into something warm and satisfying. It’s about transforming imperfect cheese into a comforting snack that feels like a small victory after a chaotic shopping day.
Turning leftovers into comfort
- I love how these muffins turn leftover cheese into something warm and satisfying, especially on chilly mornings.
- There’s a nostalgic joy in slicing into a golden muffin and seeing that melty, cheesy center.
- Baking these feels like a small act of rebellion against food waste, turning odds and ends into comfort.
- The aroma of toasted cheese and buttery batter always makes me pause and smile, even on busy days.
- Sharing these muffins with friends feels like passing along a little piece of homemade warmth.
The story behind this recipe
- This recipe actually started as a way to use up leftover cheese from my fridge. I’d always have bits and crumbs—some blue, some sharp cheddar—and I hated them going to waste. One day, I just mixed everything into a batter and baked it, and that was it. Turns out, cheese muffins are a sneaky way to clear out odds and ends and end up with something warm and cheesy in under half an hour.
- Baking these became a little ritual—an honest, no-fuss way to get a cheesy snack or breakfast that feels a bit like a small victory. Over the years, I’ve fine-tuned it, but the core idea stays the same: transform imperfect bits into something comforting and satisfying.
- heading:
Historical and Cultural Roots
- Cheese muffins likely originated as a practical way to use up leftover cheese and batter in home kitchens, especially in rural communities.
- Historically, similar baked cheese treats can be traced back to European regions where cheese was a staple ingredient, often baked into quick snacks.
- In some cultures, cheese-based baked goods were considered comfort food for farmers and workers, providing quick energy and warmth.
- The simple combination of cheese and batter reflects a tradition of resourcefulness, turning humble ingredients into satisfying snacks.
Key ingredients and tips
- Cheddar cheese: I love the sharpness of aged cheddar, it melts beautifully and gives a rich flavor. Feel free to swap for mozzarella if you want a milder, gooey result.
- Flour: I use all-purpose flour for a reliable rise, but whole wheat adds a nutty flavor and denser texture—adjust the liquid slightly if you do.
- Baking powder: This is my secret for fluffy muffins. If it’s old, the muffins might be flat, so check the freshness for that perfect rise.
- Eggs: They bind everything together and add moisture. If you’re out, a flaxseed or chia seed mixture can do in a pinch, but the texture will change.
- Milk: I prefer whole milk for richness, but you can use oat or almond milk for a dairy-free version—just watch the batter’s consistency.
- Butter: It makes the muffins tender and adds a toasty note. Using melted butter is easiest, but olive oil works if you want a slightly different flavor profile.
- Additional cheese: Blue cheese or feta can add a punch. Just crumble or grate finely; the flavor disperses better that way, especially with blue for smoky bites.
Spotlight on key ingredients
Cheese (Cheddar & Feta):
- Cheddar cheese: I love the sharpness of aged cheddar, it melts beautifully and gives a rich flavor. Feel free to swap for mozzarella if you want a milder, gooey result.
- Feta cheese: Crumbled feta adds a salty tang and crumbly texture that contrasts nicely with the tender muffin crumb. Use less if you prefer a milder cheese presence.
Notes for ingredient swaps
- Dairy-Free: Use a plant-based cheese alternative. It won’t melt quite the same, but adds a cheesy flavor without dairy.
- Gluten-Free: Swap all-purpose flour for a gluten-free baking mix. The texture will be slightly denser, but just as satisfying.
- Lower Fat: Replace butter with olive oil or applesauce. Expect a lighter muffin with a different richness and slightly different crumb.
- Vegan: Use flaxseed meal mixed with water instead of eggs, and a vegan cheese. The muffins will be a little softer and less gooey.
- Extra Flavor: Add chopped herbs or a pinch of smoked paprika. It boosts aroma and adds layers of savory depth.
- Cheese Variations: Swap cheddar for gouda or pepper jack for different flavor profiles. Each melts differently and influences the overall taste.
- Milk Alternatives: Use coconut milk or soy milk for a richer or more neutral flavor, depending on your preference.
Equipment & Tools
- Muffin tin: Holds the batter and shapes the muffins
- Mixing bowls: Combine ingredients separately for even mixing
- Whisk: Blend wet ingredients thoroughly
- Grater: Shred cheese efficiently and evenly
- Spatula: Fold ingredients gently to keep batter airy
- Oven thermometer (optional): Ensure precise baking temperature
Step-by-step guide to cheese muffins
- Preheat your oven to 200°C (390°F). Grease a muffin tin or line with paper liners—no sticking, no fuss.
- Gather your equipment: a mixing bowl for the batter, a whisk for blending, and a spatula for folding.
- In the bowl, whisk together 200g (about 1 1/2 cups) all-purpose flour, 1 tbsp baking powder, and a pinch of salt. This gives the muffins lift and a bit of structure.
- Grate about 150g (1 cup) of cheese—cheddar, blue, feta—whatever you’ve got. Mix it into the dry ingredients so it’s evenly distributed.
- In a separate bowl, beat 2 large eggs until slightly frothy, then stir in 120ml (1/2 cup) milk and 60g (1/4 cup) melted butter. The rich combo makes the muffins tender and flavorful.
- Pour the wet ingredients into the dry, then fold gently until just combined. Don’t overmix—lumps are okay, don’t beat the batter smooth.
- Spoon the batter into the muffin cups, filling each about 2/3 full. Keep the tops rustic and uneven—makes them charming.
- Bake for about 20–25 minutes. The muffins should turn golden, smell cheesy and toasty. The edges might slightly crack, signaling they’re ready.
- Check doneness: the tops are golden brown, a toothpick inserted in the center comes out clean, and the muffins have a slight bounce when pressed.
- Remove from oven and let sit in the tin for 5 minutes. Then transfer to a wire rack, so they cool evenly and don’t get soggy underneath.
- Allow to rest for at least 5 minutes before serving. Warm, melty, with a crusty top—perfect for breakfast or a snack.
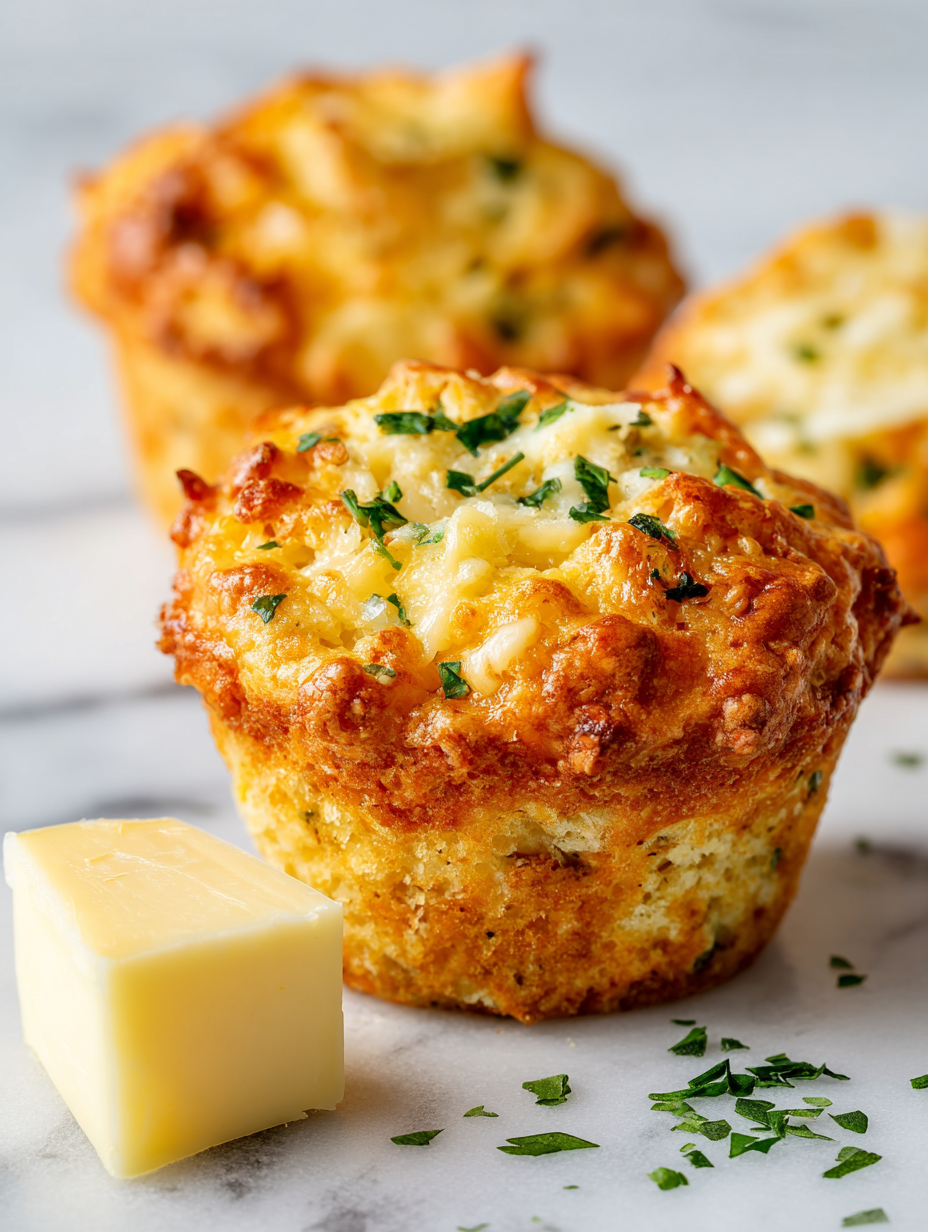
Let the muffins rest in the tin for 5 minutes, then transfer to a wire rack. Serve warm or at room temperature, sliced or whole, with a pat of butter if you like.
How to Know It’s Done
- Golden brown tops and edges, smell of toasted cheese
- A toothpick inserted in the center comes out clean
- Muffins have a slight jiggle but hold their shape
Cheese Muffins from Leftover Cheeses
Ingredients
Equipment
Method
- Preheat your oven to 200°C (390°F) and lightly grease the muffin tin or line it with paper liners.
- In a large mixing bowl, whisk together the flour, baking powder, and salt until evenly combined. This creates a light base for the batter.
- Grate or crumble your leftover cheeses into a separate bowl, then gently fold them into the dry ingredients to distribute evenly, adding flavor and texture.
- In another bowl, beat the eggs until slightly frothy, then stir in the milk and melted butter to create a smooth, combined mixture.
- Pour the wet mixture into the bowl with the dry ingredients and gently fold everything together with a spatula. Do not overmix; just combine until you see a few lumps.
- Spoon the batter evenly into the prepared muffin cups, filling each about two-thirds full to allow room for rising.
- Bake the muffins in the preheated oven for 20–25 minutes, until they turn golden brown on top and a toothpick inserted into the center comes out clean.
- Remove the muffins from the oven and let them rest in the tin for about 5 minutes, which helps them set and makes them easier to remove.
- Transfer the muffins to a wire rack to cool slightly, or serve warm directly from the tin for a melty, cheesy treat.
- Enjoy your cheesy muffins warm or at room temperature, perhaps with a pat of butter or a drizzle of honey for extra flavor.
Notes
Pro tips for perfect cheese muffins
- Use room temperature ingredients for better mixing and rise.
- Gently fold in cheese to avoid deflating the batter.
- Fill muffin cups about 2/3 full for even baking and domed tops.
- Bake until golden and a toothpick comes out clean, about 20-25 minutes.
- Let muffins rest 5 minutes before removing to keep them intact.
- Use a convection setting if available for a more even browning.
- For extra cheesy flavor, sprinkle a little more cheese on top before baking.
Common mistakes and how to fix them
- FORGOT to check oven temperature → use an oven thermometer for accuracy.
- DUMPED all cheese at once → sprinkle cheeses gradually for even melting and flavor.
- OVER-TORCHED muffins → remove when tops are golden and edges are slightly crisp.
- MISSED resting time → let muffins sit 5 minutes to settle and prevent breaking.
Quick fixes and pantry swaps
- When muffins turn flat → splash a little extra baking powder into the batter.
- If cheese isn’t melting properly → sprinkle a few more cheese bits on top before baking.
- Over-baked muffins smell burnt → lower oven temperature slightly or check oven calibration.
- Forgot to preheat → start oven earlier or bake at a slightly lower temp for even cooking.
- Dumped in cheese all at once → fold cheese gently for even distribution and melting.
Prep, store, and reheat tips
- Prepare the batter ahead of time; it keeps well in the fridge for up to 24 hours, and the flavors meld beautifully over that time, making the muffins extra savory.
- Store baked muffins in an airtight container at room temperature for up to 2 days; they stay moist and cheesy, but refrigerate if you need longer shelf life.
- For longer storage, freeze muffins in a zip-top bag for up to 1 month; reheat directly from frozen for a warm, gooey snack.
- Reheat muffins in a 180°C (350°F) oven for 10 minutes or until the cheese is melty and the crust is crisp. You can also microwave for 20-30 seconds, but the texture won’t be as crispy.
- The aroma of reheated muffins will be intensely cheesy and toasted, with a warm, inviting scent that makes it hard to wait.
Top questions about cheese muffins
1. When is the ideal time to eat cheese muffins?
Cheese muffins are best served warm, when the cheese inside is melty and gooey, giving that comforting stretch with each bite.
2. Which cheese works best for the muffins?
Use a sharp cheddar for a bold flavor, or mozzarella for a milder, stretchier bite. Blue cheese adds a smoky punch.
3. Can I use different types of flour?
You can swap the all-purpose flour for whole wheat for a nuttier flavor, but expect a denser crumb and slightly different rise.
4. How do I store and reheat leftovers?
Yes, you can freeze baked muffins for up to a month. Reheat in the oven for best texture, about 10 minutes at 180°C (350°F).
5. How can I customize the flavor?
Add some chopped herbs or a pinch of smoked paprika into the batter to boost aroma and add flavor layers.
6. What if my muffins don’t rise properly?
If the muffins turn out flat, ensure your baking powder is fresh and the oven is properly preheated to around 200°C (390°F).
7. Should ingredients be cold or warm?
Use room temperature eggs and milk to help the batter come together smoothly and give a better rise.
8. How do I incorporate the cheese?
Mix the cheese into the dry ingredients gently to avoid deflating the batter and to ensure even distribution.
9. How long should I bake them?
Baking for about 20–25 minutes usually does the trick. The muffins should be golden and smell cheesy and toasted.
10. What should I do if they burn or crack?
If the muffins crack excessively or burn, lower the oven temperature slightly or cover with foil mid-bake.
These cheese muffins are a quiet staple, simple but satisfying, especially when you need something warm and cheesy in a pinch. They hold onto that nostalgic, homey scent of melted cheese and toasted batter, filling the kitchen with a cozy vibe.
No matter how many times I bake them, I’m always surprised how a few odds and ends of cheese can turn into something so comforting. They’re perfect for lazy mornings, unexpected guests, or just a quick snack that feels like a little win.

Hi, I’m Ava Bennett. Welcome to Glowing With Pride. I’m Ava Bennett, a professional chef, recipe developer, and lifelong believer that food is one of the most powerful ways we express love, identity, and joy. This space was created from years of working in professional kitchens, countless late nights behind the line, and a deep desire to share food in a way that feels personal, proud, and purposeful. Cooking has never just been my career. It has been my language.


Leave a Reply