These banana oat bars are my little rescue in the mornings. There’s something about that warm, toasted oat smell mingling with ripe banana that feels like a hug in food form. I love how they’re both a nostalgic comfort and a quick energy boost, perfect when you’re rushing out the door or just craving something honest and simple. They remind me of lazy weekend mornings, but they’re sturdy enough to carry along for a busy afternoon too.
I’ve tweaked this recipe over the years, trying to keep it wholesome but not fussy. It’s a no-fuss bake—no fancy ingredients, just ripe bananas, oats, and a touch of honey. The best part? They stay moist but hold together well, so I can toss a couple in my bag without worrying about crumbs or mess. Just honest, satisfying bites that hit the spot every time.
Focusing on how these bars can be a comforting, nostalgic treat that also doubles as a quick energy fix during hectic mornings or busy afternoons.
The story behind this recipe
- This recipe came from a lazy Sunday afternoon when I had overly ripe bananas sitting on the counter, a bit too soft to eat straight but perfect for baking. I wanted something that could bridge the gap between breakfast and snack, something that felt both wholesome and indulgent without fuss. The smell of toasted oats and sweet banana bubbling in the oven always takes me back to childhood mornings, simple and comforting.
- Over the years, these bars became a go-to for my chaotic mornings, especially when I needed quick nourishment that didn’t require plates or utensils. I love how adaptable they are—add nuts, chocolate chips, or dried fruit depending on what I have. They’re honest, no-nonsense, and somehow manage to feel special every single time I make them.
- heading: The story behind this recipe
Ingredient breakdown
- Bananas: I use ripe bananas that smell sweet and have lots of black spots; their softness makes the bars naturally sweet. If yours are just a little underripe, add a touch more honey or maple syrup.
- Rolled oats: I prefer old-fashioned oats for that chewy texture and hearty bite. If you only have quick oats, expect a slightly softer, more cohesive bar—less chewy but still delicious.
- Honey or maple syrup: I love the rich, golden sweetness it adds, making the bars moisture-rich and tender. For a less sweet version, cut back a bit, or swap with mashed bananas for a fruitier flavor.
- Nut butter: I often mix in peanut or almond butter for richness and binding. If you’re nut-free, coconut oil or sunflower seed butter works well—just expect a different flavor profile.
- Add-ins: I like tossing in chocolate chips or chopped nuts for texture and bursts of flavor. If you want to keep it simple, just stick to the basic mixture—these are flexible.
- Salt: A pinch enhances sweetness and rounds out flavors. Don’t skip it, even if you’re tempted—without it, the bars can taste flat and dull.
- Vanilla extract: A splash deepens the flavor and adds warmth. If you don’t have any, a pinch of cinnamon or nutmeg can bring a cozy note instead.
Spotlight on key ingredients
Bananas:
- I look for bananas with lots of black spots; their soft, sweet flesh melts into the bars, giving natural sweetness and moisture. If yours are less ripe, consider adding a drizzle more honey or maple syrup.
- Rolled oats: I prefer the old-fashioned kind for that chewy, hearty bite. Quick oats will soften more during baking, making the bars more tender but less chewy—either works depending on your texture preference.
Sweetener:
- Honey or maple syrup: I love how their golden, sticky sweetness keeps the bars moist and tender. The aroma of caramelizing honey is a cozy scent that fills the kitchen. Swap with agave if you need it vegan, but expect a slightly different flavor and consistency.
- ingredient
Notes for ingredient swaps
- Dairy-Free: Swap regular butter with coconut oil or vegan margarine—expect a slightly coconutty flavor and a softer texture.
- Sweetener: Use agave syrup or brown rice syrup instead of honey or maple—these will alter the sweetness profile subtly.
- Nut Butter: Almond or cashew butter can replace peanut butter—each adds its own subtle flavor twist and creaminess.
- Oats: Steel-cut oats can be used but will need longer soaking and may result in a chewier bar; quick oats will make a softer texture.
- Add-ins: Dried fruits or seeds instead of chocolate chips or nuts—expect more chew and natural sweetness, less richness.
- Bananas: Mashed avocado can add moisture and healthy fats, but will give a different, more neutral flavor.
- Flour: A small amount of whole wheat or spelt flour can be added for extra structure—expect a nuttier, denser bite.
Equipment & Tools
- Baking pan: Holds the mixture during baking and shapes the bars.
- Mixing bowls: Combine ingredients thoroughly.
- Spatula: Spread and press mixture evenly into the pan.
- Measuring cups: Ensure accurate ingredient quantities.
- Parchment paper: Prevent sticking and make removal easy.
Step-by-step guide to banana oat bars
- Gather equipment: 20 cm (8-inch) square baking pan, mixing bowls, spatula, measuring cups, and a parchment paper liner for easy removal.
- Preheat your oven to 180°C (350°F). Line the baking pan with parchment, leaving overhang for easy lifting.
- In a large bowl, mash 3 ripe bananas with a fork until mostly smooth, some small lumps are okay. This adds natural sweetness and moisture.
- Add 1 cup (90g) rolled oats, ¼ cup (60ml) honey or maple syrup, 2 tbsp nut butter, a pinch of salt, and 1 tsp vanilla extract to the bananas. Mix until well combined. The mixture should be sticky but spreadable.
- If you’d like extras, fold in ¼ cup chopped nuts or chocolate chips now. Keep it loose—less is more if you want a clean slice.
- Pour the mixture into the prepared pan. Use a spatula to spread evenly, pressing down lightly to compact.
- Bake for 20–25 minutes. Check at 20 minutes: the edges should be golden, the top slightly firm, and a toothpick inserted in the center comes out clean.
- Once baked, let it cool in the pan on a wire rack for at least 15 minutes. This helps set the bars and prevents crumbling.
- Lift the bars out using the parchment overhang. Slice into squares or rectangles while still slightly warm for cleaner cuts. Let cool completely before storing.
Allow the bars to cool completely on a wire rack. Slice into desired sizes and enjoy immediately or store in an airtight container for up to 3 days. For longer storage, freeze individual portions and reheat briefly in the microwave, watching for that fragrant, toasted oat aroma.
How to Know It’s Done
- Edges are golden and slightly crisp.
- Toothpick in center comes out clean.
- Bars feel firm but not hard when gently pressed.
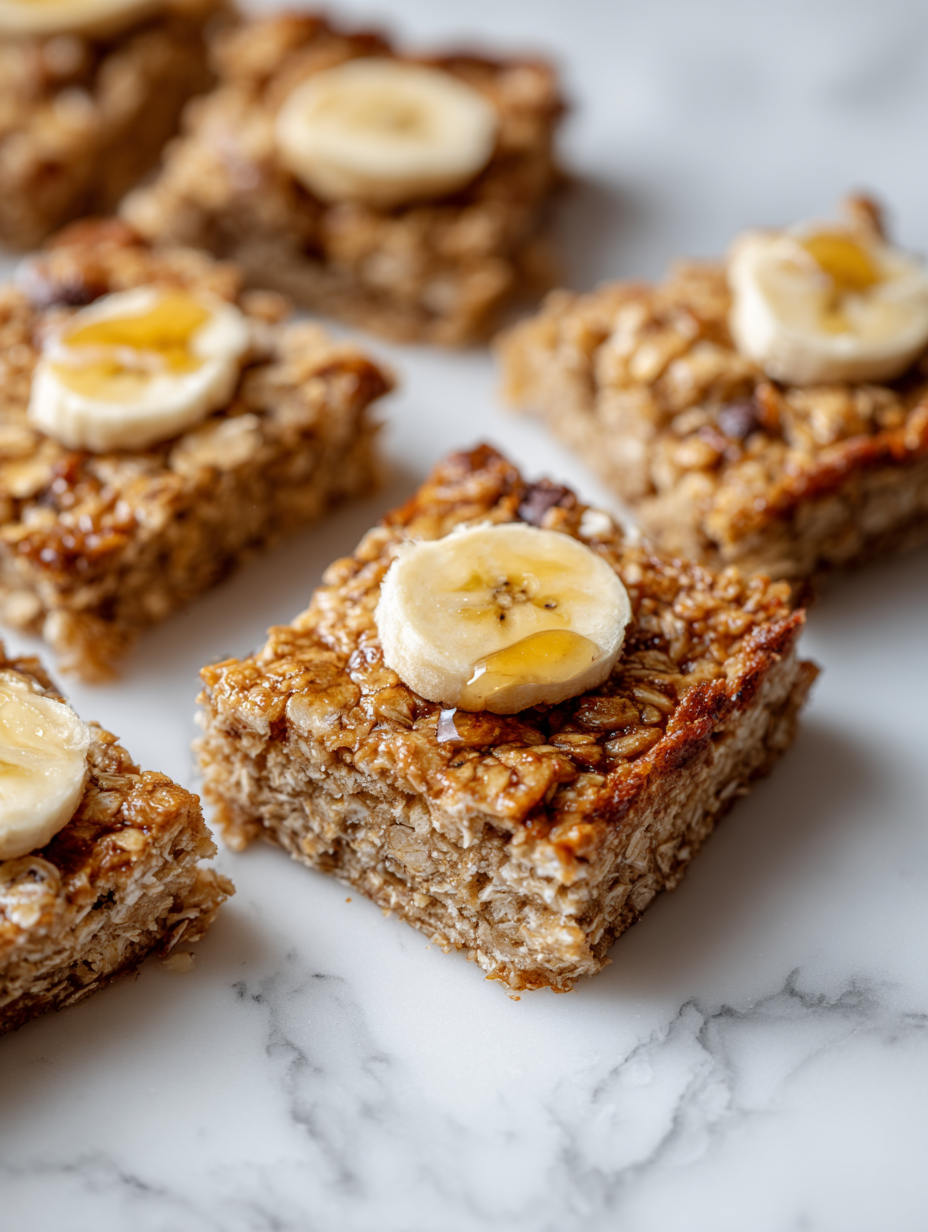
Banana Oat Bars
Ingredients
Equipment
Method
- Preheat your oven to 180°C (350°F). Line an 8-inch baking pan with parchment paper, leaving overhang for easy removal.
- In a large bowl, mash the bananas with a fork until mostly smooth, with small lumps remaining for texture.
- Add the honey or maple syrup, nut butter, salt, and vanilla extract to the mashed bananas. Mix thoroughly until the mixture is sticky, smooth, and fragrant.
- Stir in the rolled oats until evenly combined. If using, fold in chopped nuts or chocolate chips for extra flavor and texture.
- Pour the mixture into the prepared pan. Use a spatula to spread and press it evenly into the corners, compacting slightly for sturdy bars.
- Bake in the preheated oven for 20–25 minutes, until the edges are golden brown and the top feels firm to the touch. A toothpick inserted in the center should come out clean.
- Remove the pan from the oven and let the bars cool in the pan for 15 minutes. This helps them set and makes slicing easier.
- Lift the cooled bars out of the pan using the parchment overhang. Slice into squares or rectangles with a sharp knife.
- Let the bars cool completely on a wire rack before serving. Enjoy fresh or store in an airtight container for up to 3 days.
Pro tips for perfect banana oat bars
- Use ripe bananas with black spots for maximum sweetness and moisture; they mash easily and flavor the bars.
- Toast the oats lightly before mixing to enhance their nutty aroma and deepen flavor.
- Mix wet ingredients thoroughly to ensure even distribution, especially the mashed bananas and honey.
- Press the mixture firmly into the pan to prevent crumbling and ensure even baking.
- Bake until the edges are golden and slightly crisp, but don’t overcook—the bars should stay moist inside.
- Cool completely before slicing to set the bars and avoid squishing or crumbling.
Common mistakes and how to fix them
- FORGOT to check oven temperature → Use an oven thermometer for accuracy.
- DUMPED in too many add-ins → Keep add-ins minimal for better texture and cohesion.
- OVER-TORCHED the edges → Cover loosely with foil if edges brown too quickly.
- MISSED the resting time → Let bars cool fully to prevent crumbling when slicing.
Quick fixes and pantry swaps
- When the bars are too crumbly, splash a little extra honey and gently press again.
- If the edges burn quickly, shield with foil and lower the oven temperature slightly.
- Dumped in too many add-ins? Fold in less next time for a cleaner slice.
- When the mixture is too wet, sprinkle a bit more oats to absorb excess moisture.
- Splash a teaspoon of lemon juice if bananas brown too much, keeping flavor bright.
Make-Ahead and Storage Tips
- Prep the mixture ahead: Mash bananas and combine dry ingredients the night before for quick assembly.
- Store the baked bars in an airtight container at room temperature for up to 3 days, keeping them moist and fragrant.
- For longer storage, wrap bars individually and freeze for up to 1 month; reheat in the microwave until warm and fragrant, about 20 seconds, until oats smell toasted and aroma is inviting.
- Refrigerate leftovers to prolong freshness, but bring to room temp or warm slightly for best texture and aroma before serving.
Top questions about banana oat bars
1. Should I use very ripe bananas?
Look for bananas with lots of black spots; they’re super soft and sweet, which makes the bars naturally flavorful. If yours are less ripe, add a touch more honey for that extra moisture and sweetness.
2. Can I use underripe bananas?
Yes, using ripe bananas makes the bars sweeter and moister. Slightly underripe bananas can work, but you might want to add a bit more sweetener.
3. Can I substitute the sweetener?
Absolutely. You can swap out honey or maple syrup with agave syrup or brown rice syrup, but expect a different sweetness profile and slightly different texture.
4. Can I use different nut butters?
Yes, almond or cashew butter are good alternatives. They add richness and creaminess, but expect a slightly different flavor—more nutty or mellow.
5. Can I use other types of oats?
If you don’t have oats, steel-cut oats need longer soaking, and may give a chewier texture. Quick oats will soften more but still work well for a tender bar.
6. Can I add other mix-ins?
Yes, dried fruits or seeds like chia or sunflower seeds can replace chocolate or nuts. Expect more natural sweetness and crunch without the richness of chocolate.
7. What if my bananas aren’t ripe enough?
Using unripe bananas will make the bars less sweet and moister. Consider adding an extra spoonful of honey or maple syrup if you prefer more flavor.
8. How do I know when they’re done?
Bake until the edges are golden and the top feels firm but not hard. A toothpick inserted in the center should come out clean, and the bars should smell toasted and sweet.
9. How should I store leftovers?
Store baked bars in an airtight container at room temperature for up to 3 days. For longer, wrap individually and freeze for up to a month, reheating briefly in the microwave.
10. Why do my bars crumble?
If the bars crumble when sliced, let them cool completely. If they’re too soft, pop them back in the oven for a few minutes or add a bit more oats next time.
These banana oat bars bring back a quiet, cozy feeling every time I bake them. There’s a familiarity in their chewy texture and the sweet, toasted aroma that fills the kitchen. They’re a simple reminder that good, honest ingredients can turn into something comforting and satisfying.
Whenever I stash a few away in the freezer, I appreciate how they thaw quickly and still smell like a warm breakfast. It’s these little moments—those familiar smells and textures—that keep me coming back, especially on mornings when I need a quick, nourishing bite without fuss.

Hi, I’m Ava Bennett. Welcome to Glowing With Pride. I’m Ava Bennett, a professional chef, recipe developer, and lifelong believer that food is one of the most powerful ways we express love, identity, and joy. This space was created from years of working in professional kitchens, countless late nights behind the line, and a deep desire to share food in a way that feels personal, proud, and purposeful. Cooking has never just been my career. It has been my language.


Leave a Reply