Bran muffins might seem like humble, old-school breakfast fare, but I’ve always loved how portable and adaptable they are. Perfect for busy mornings when you need something quick yet satisfying, they can be whipped up ahead of time and tucked into a bag or purse without fuss. Over the years, I’ve come to see them as a blank canvas—waiting for whatever mix-ins or toppings you prefer, from dried fruit to nuts or even a smear of peanut butter.
There’s something about the texture too—hearty, moist, with a slight chew that keeps you full longer. I like to think of bran muffins as a breakfast that’s not just about nutrition but also about customizing each morning’s start. Whether I’m rushing out the door or sitting down in a quiet moment, they remind me that simple, good food can be both practical and comforting.
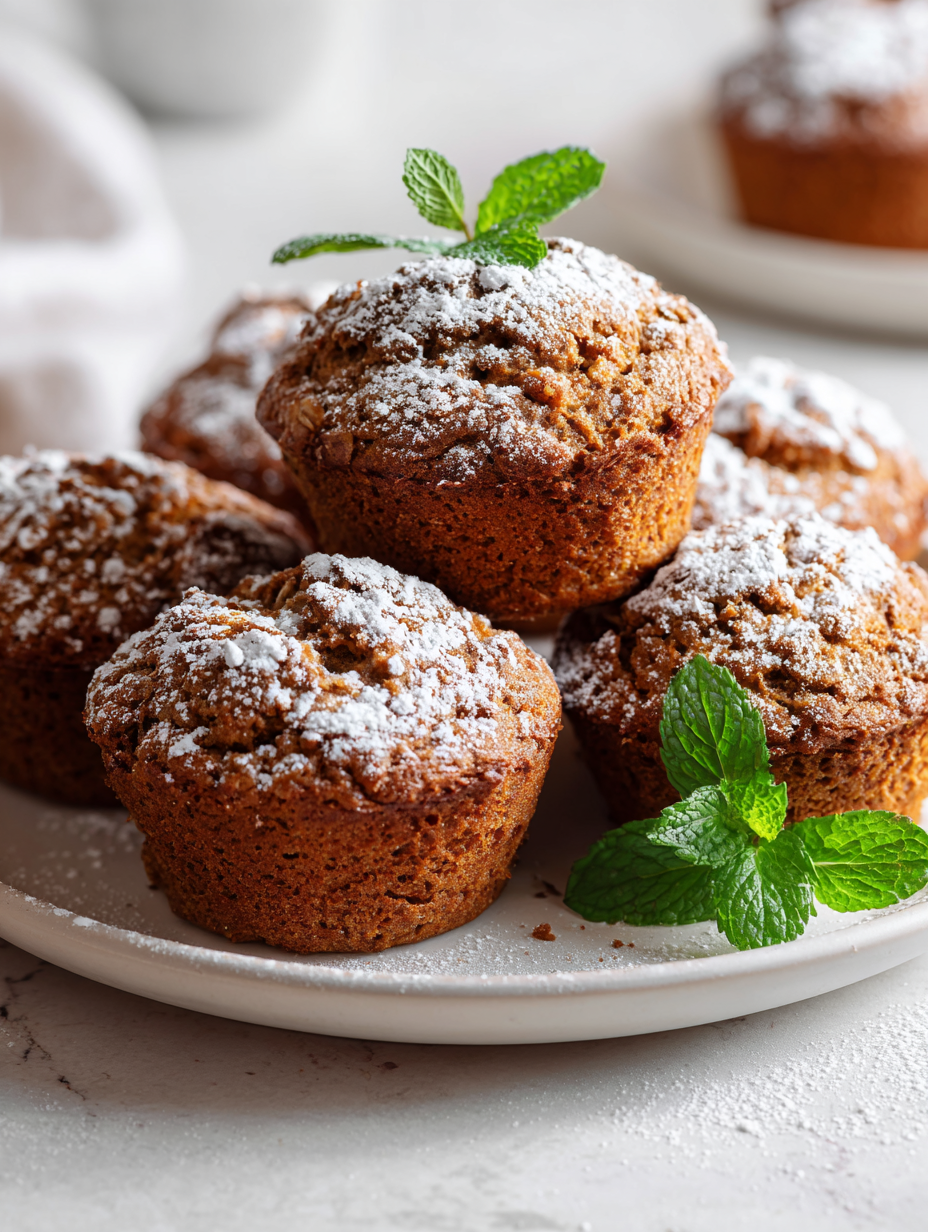
Focusing on using bran muffins as a versatile breakfast on-the-go, highlighting their portability and how they can be customized with different mix-ins for varied mornings.
A Breakfast You Can Customize
- I’ve always felt a little nostalgic about bran muffins — reminds me of my grandma’s kitchen on quiet mornings.
- There’s a quiet pride in mastering a recipe that’s both hearty and forgiving, perfect for busy weekdays.
- Sometimes, I just need that slightly smoky, nutty aroma wafting through the house to start my day right.
- Making these muffins feels like a small act of self-care — simple ingredients, big comfort.
- I love how a batch can be a blank slate for endless tweaks, making each morning a tiny adventure.
The story behind this recipe
- This recipe was born out of a busy morning when I needed something quick, filling, and adaptable. I love the way bran muffins can be both a healthful snack and a comforting start to the day. Over the years, I’ve tweaked my grandma’s traditional version to include a bit of molasses and a splash of buttermilk for extra depth.
- One weekend, I had a handful of dried cranberries and chopped pecans that I wanted to use up. Tossing them into the batter turned these muffins into a little celebration of flavors and textures. Now, they’re my go-to for mornings when I need a boost but don’t want to fuss over baking.
- heading: ‘The story behind this recipe’
History and Trivia of Bran Muffins
- Bran muffins gained popularity in the early 20th century as a healthful breakfast option, thanks to their high fiber content.
- They were often marketed as a remedy for digestive issues, emphasizing their role in promoting regularity and gut health.
- The inclusion of bran in baked goods became a symbol of wholesome, fiber-rich eating during the health movement of the 1920s and 30s.
- Many traditional recipes stem from bakeries in the Midwest, where bran was a common leftover from grain processing.
- Today, bran muffins are making a comeback as part of the clean-eating trend, with modern twists like added nuts, fruits, or seeds.
Ingredient breakdown
- Whole wheat bran: I love the nutty, slightly chewy texture it adds; for a lighter version, try wheat germ instead.
- All-purpose flour: It gives the muffins a tender crumb; swap with almond flour for a gluten-free touch, but expect a denser muffin.
- Brown sugar: I prefer the molasses undertone it provides; for less sweetness, reduce the amount or substitute with coconut sugar.
- Buttermilk: It keeps the muffins moist and tangy; regular milk with a splash of lemon juice works if you’re out of buttermilk.
- Eggs: They bind everything together and add richness; flax eggs can be a good vegan substitute, but they change the texture slightly.
- Sweet mix-ins (e.g., dried fruit, nuts): I toss in what I have—cranberries, chopped walnuts, or even chocolate chips for a treat.
- Spices (cinnamon, nutmeg): Just a pinch elevates the flavor; go heavier if you want a cozy, warming aroma in every bite.
Spotlight on key ingredients
Whole wheat bran:
- I love how it adds a nutty, slightly chewy texture; it also boosts fiber in every bite.
- During baking, it becomes tender yet maintains a slight grit, giving the muffin a hearty feel. It’s the backbone of these muffins.
Buttermilk:
- I love its tangy aroma and moistening effect; during baking, it reacts with baking soda for a little lift.
- If you don’t have buttermilk, use milk with a splash of lemon juice—it’s almost as good, with a slightly milder tang.
Notes for ingredient swaps
- Dairy-Free: Use almond or soy milk instead of buttermilk for a plant-based version. Slightly less tang, but still moist.
- Gluten-Free: Swap all-purpose flour with a gluten-free blend. Expect a denser crumb, but still hearty.
- Sweetener: Replace brown sugar with honey or maple syrup. Reduce liquid slightly to compensate for moisture.
- Add-ins: Use chopped dried apricots or cranberries instead of nuts or chocolate for a fruity twist.
- Oil: Substitute with applesauce for a lower-fat muffin, which makes them a bit softer and less crispy.
- Spices: Omit or add more cinnamon, nutmeg, or ginger depending on your flavor preference. Smell will shift from plain to aromatic.
- Flour Type: Whole wheat pastry flour gives a lighter texture than regular whole wheat, but keeps the fiber.
Equipment & Tools
- Mixing bowl: Combine dry and wet ingredients easily.
- Whisk: Blend ingredients smoothly without lumps.
- Muffin tin: Shape and bake the muffins evenly.
- Spatula: Fold ingredients gently to avoid overmixing.
- Toothpick: Test for doneness.
Step-by-step guide to baking
- Gather your equipment: a mixing bowl, a whisk, a muffin tin, and a spatula. Preheat oven to 180°C (350°F).
- In a large bowl, whisk together 1 cup of whole wheat bran, 1 cup of all-purpose flour, 1/2 cup of brown sugar, 1 tsp of baking powder, and 1/2 tsp of baking soda. Add a pinch of salt and your preferred spices (cinnamon, nutmeg).
- In a separate bowl, beat 2 large eggs until slightly frothy, then stir in 1 cup of buttermilk and 1/4 cup of melted butter or oil. If using flax eggs, prepare accordingly.
- Pour the wet ingredients into the dry and fold gently with a spatula until just combined. Don’t overmix; a few lumps are fine.
- Fold in 3/4 cup of dried fruit, nuts, or chocolate chips if desired. The batter should be thick but scoopable.
- Line your muffin tin with paper liners or lightly grease. Using a scoop or two spoons, portion the batter into the muffin cups, filling about 3/4 full.
- Bake for 15-20 minutes. Check for doneness by inserting a toothpick into the center—if it comes out clean, they’re ready. Look for a golden-brown top and a pleasant, nutty aroma.
- Remove from oven; let the muffins rest in the tin for 5 minutes. Then transfer to a wire rack to cool slightly before serving.
Let the muffins cool in the tin for 5 minutes, then transfer to a wire rack. Serve warm or at room temperature, with butter or jam if desired.
How to Know It’s Done
- Muffins are golden and slightly cracked on top.
- Toothpick inserted in center comes out clean.
- The muffins feel firm but spring back when gently pressed.
Classic Bran Muffins
Ingredients
Equipment
Method
- Preheat your oven to 180°C (350°F) and line a muffin tin with paper liners or lightly grease it.
- In a large mixing bowl, whisk together the whole wheat bran, all-purpose flour, brown sugar, baking powder, baking soda, salt, and spices if using. This creates a well-balanced dry mixture that will give your muffins a hearty texture.
- In a separate bowl, beat the eggs until slightly frothy, then stir in the buttermilk and melted butter or oil. Whisk until the mixture is smooth and slightly bubbly — this helps incorporate air and flavor.
- Pour the wet ingredients into the dry mixture and gently fold with a spatula until just combined. Be careful not to overmix; some lumps are fine, and this keeps the muffins tender.
- Gently fold in your optional mix-ins like dried fruit, chopped nuts, or chocolate chips for added flavor and texture. The batter will be thick but scoopable.
- Using a scoop or two spoons, evenly distribute the batter into the prepared muffin cups, filling each about three-quarters full. This helps ensure uniform baking and a nice rise.
- Bake for 15-20 minutes, or until the muffins are golden brown on top and a toothpick inserted into the center comes out clean. You’ll notice a pleasant nutty aroma filling the kitchen as they bake.
- Remove the muffins from the oven and let them rest in the tin for about 5 minutes to set. Then, transfer them to a wire rack to cool slightly or serve warm.
- Enjoy these moist, hearty bran muffins plain or with a smear of butter, jam, or your favorite spread. They keep well in an airtight container for a couple of days or can be frozen for later.
Pro tips for perfect bran muffins
- Use a gentle hand when folding dry into wet ingredients to keep the muffins light and airy.
- Let the batter rest for 5 minutes before scooping—this helps the bran hydrate fully, making muffins more tender.
- To prevent overbaking, start checking for doneness at 15 minutes—every oven heats just a little differently.
- For extra moist muffins, add a tablespoon of yogurt or applesauce to the wet ingredients.
- Use an ice cream scoop for uniform muffin sizes—this ensures even baking and a tidy appearance.
- If muffins crack on top, they’ve baked at the right temperature—just don’t overbake, or they’ll dry out.
- For a shiny top, brush with a little melted butter or honey during the last 5 minutes of baking.
Common mistakes and how to fix them
- TOO DRY: Overbaking causes dryness; fix by reducing bake time or adding a bit more moisture.
- TOO MOIST: Underbaked muffins feel dense; ensure proper oven temperature and check with a toothpick.
- UNEVEN RISE: Poor oven heat distribution leads to flat muffins; rotate the tin halfway through baking.
- TOUGH TEXTURE: Overmixing batter develops gluten; mix just until ingredients are combined.
Quick fixes and pantry swaps
- When muffins crack on top, they’re overbaked; reduce baking time or lower oven temperature.
- If muffins are too dry, add a splash of milk or extra butter to the batter next time.
- When batter is too thick, stir in a little more buttermilk for better scoopability.
- Splash a little lemon juice into milk to make quick buttermilk if you’re out.
- Patch a cracked muffin by gently pressing the crack closed and baking a minute longer.
Prep, store, and reheat tips
- Prepare the batter the night before, cover tightly, and refrigerate. The flavors meld and the batter chills, making morning prep quicker and the muffins even moister.
- Store baked muffins in an airtight container at room temperature for up to 2 days; they stay soft and fragrant, with a slight chewiness that’s just right.
- For longer storage, freeze muffins individually wrapped in plastic wrap, then place in a zip-top bag. They keep well for up to 3 months, with a faintly frosty aroma when reheated.
- Reheat muffins in a 180°C (350°F) oven for 10 minutes or until warm and fragrant; or microwave for 20-30 seconds for a quick, steamy bite. Expect that comforting, moist crumb to return.
Top questions about bran muffins
1. Can I use wheat germ instead of bran?
Use whole wheat bran for a hearty texture, but you can try wheat germ for a lighter feel. The flavor is nutty and slightly chewy, which makes each bite satisfying.
2. Can I replace buttermilk with milk?
Yes, swapping buttermilk with regular milk plus a splash of lemon juice works well. The muffins will be a bit milder in tang but still moist and tender.
3. Are dairy-free options possible?
Absolutely. Use a dairy-free milk like almond or soy milk. Your muffins will be just as filling, though they might lack a little tang.
4. How do I know when they’re done?
Bake until the tops are golden and slightly cracked, and a toothpick inserted in the center comes out clean. The muffins should feel firm but springy.
5. Can I freeze bran muffins?
Yes, freezing works great. Cool muffins completely, then wrap individually and store in a zip-top bag for up to three months. Reheat in the oven or microwave until steamy.
6. Can I customize the mix-ins?
Adding dried fruit like cranberries or chopped nuts enhances flavor and texture. Feel free to experiment with your favorites for a personalized touch.
7. What if they brown too fast?
You can reduce the bake time slightly if your muffins are browning too quickly. Keep an eye on them after 15 minutes and test for doneness earlier.
8. How do I avoid tough muffins?
Overmixing can lead to dense muffins. Mix just until ingredients are combined, leaving a few lumps for a tender crumb.
9. How should I store muffins?
Store baked muffins in an airtight container at room temperature for up to 2 days. For longer storage, freeze. Reheat gently until warm and fragrant.
10. Why do my muffins crack?
If muffins crack on top, they’re usually overbaked or oven temperature is too high. Reduce baking time or lower the heat slightly for perfect tops.
These bran muffins are a reminder that simple ingredients, handled with care, can become something truly satisfying. When you bite into one, you’ll notice the hearty chew and nutty aroma, grounding you in the moment. They’re perfect for mornings when you need a quick boost or a quiet moment of comfort.
In a season of busy days and fleeting mornings, having a batch ready to go feels like a small act of kindness. Whether enjoyed warm or at room temperature, these muffins keep my breakfast routines grounded in taste and practicality. Sometimes, it’s the simplest recipes that leave the biggest mark.

Hi, I’m Ava Bennett. Welcome to Glowing With Pride. I’m Ava Bennett, a professional chef, recipe developer, and lifelong believer that food is one of the most powerful ways we express love, identity, and joy. This space was created from years of working in professional kitchens, countless late nights behind the line, and a deep desire to share food in a way that feels personal, proud, and purposeful. Cooking has never just been my career. It has been my language.


Leave a Reply